Regalo Extra Tall Extra Wide Baby Gate, 29''-52'' With Walk Through Door
The Basics
"Who inhabits the jumbo desert freehold of Nanru? The Gathered Men.
The fiefdoms of Odrum? The Kneeling Men.
The jungles of Yyp? The Breathless Men.
And the rust-caves of Qud? The Screaming Men."
-Dromad travelogue
Caves of Qud is a traditional roguelike, meaning that:
1) Information technology is completely plow-based. Animations might brand information technology seem that things run in existent time, only enemies and effects volition only movement when you do.
2) At that place is permadeath. You lot tin plough this off in the options if you need to.
three) Every turn counts. Half of the game is about proper positioning and managing your turns so that you aren't swarmed.
4) Levels are entirely randomized. Levels will look different in every game.
Controls
Numpad or arrow keys to move. Numpad is preferred since you tin move diagonally in this game. You lot can rebind controls by hitting escape to become to the options menu.
Escape: options menu
'a': abilities
'x': character stats
'q': quests
'due east': equipment
'i': inventory
Numpad decimal: wait 20 turns
ctrl+numpad decimal: wait 100 turns
'~': wait until healed
infinite: interact (speak with, open, etc.) with nearby object.
'm': become
's': search around for invisible enemies.
'f': fire weapon in ranged slot
't': throw weapon in throwing slot
You lot set on by moving into a hostile enemy, or by property ctrl and striking a management.
Stats

Strength: Each bonus increases the penetration value of your weapons, until you achieve that weapon's "force bonus cap". Stronger weapons have stronger caps, and some stronger weapons don't confer any benefit over weaker ones until you surpass the weaker weapon's bonus cap.
Agility: Each bonus increases your DV, or dodge value. Enemies must brand an accuracy check confronting your DV to get this. Information technology also increases the accuracy of your attacks, and is especially important for ranged weaponry. It also affects the penetration value of daggers if you accept the 'shank' skill.
Toughness: Each point increases your maximum HP, and your HP regeneration. Information technology is also used in several skills to determine your ability to shake off negative status effects.
Intelligence: Each bespeak gives you 4 skill points per level. If you get a bespeak of intelligence via levelups, the skill points you would have gotten are received retroactively. It also affects your ability to examine artefacts without breaking them.
Willpower: Each bonus increases your "mental armor", which is only useful in determining your ability to resist the skills Syphon Vim and Sunder Heed. Information technology likewise increases your HP regeneration, and, well-nigh importantly, reduces the cooldown of your mental mutations.
Ego: Mutants with mental mutations volition want to put virtually of their points in this stat. Each bonus increases the level of your mental mutations by 1, saving you mutation points which you can spend to get fifty-fifty more mutations. It too affects prices when trading.
At that place is also:

AV: Armor value, given by armor. Each indicate is used to resist penetration from enemy weapons.
DV: Dodge value, given past agility and armor. Each point is used to dodge attacks.
QN: Quickness. Each fourth dimension it is your plough to act, y'all accept this many points to spend. Every action you do has an 'energy cost', and when you spend more than energy than your quickness, your turn ends.
MS: Movement speed. How much energy moving costs is related to this, but information technology is unknown by how. Higher is better.
HP: Your hitpoints. If this goes to cipher or below, you die.
T: Temperature. If this is less than -100, you are frozen and can merely use mental mutations. If this is beneath 0, your quickness decreases. If this is more than 300, y'all are on burn down and will accept damage every turn unless you dunk yourself in water.
The number beside your hitpoints are your current and maximum conduct weight.
And, in your status screen (hitting 'ten' to view):
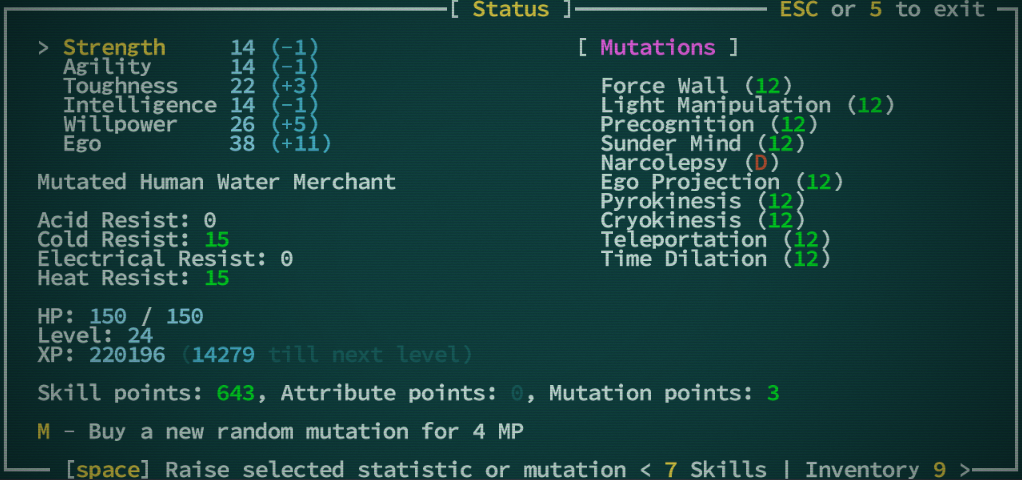
Skill points: Used to buy skills.
Attribute points: Obtained once every few levels, can be spent to increase a stat past 1 permanently.
Mutation points: Used to buy new mutations or improve existing ones.
Your mutations/cybernetics are also displayed here along with their level
Creating a Character
How you build your character is up to you, but consider the following builds:
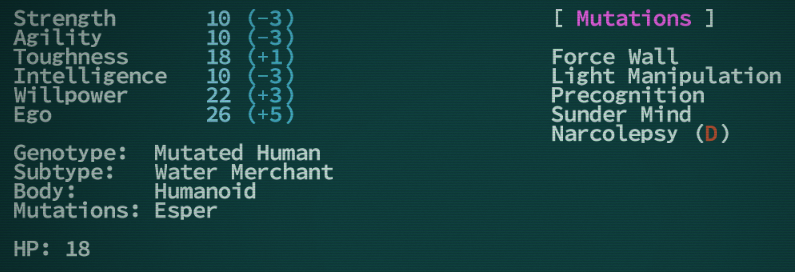
Playing an Esper with high ego is simple: Just pump your ego every bit high as it will go and your mental mutations will level upwardly with you. For physical mutations, you demand to spend mutation points in club to improve them. For the mental mutations that espers rely on, these mutations will scale with your ego (but are capped by your level). This recommended build gives you access to the following skills:
Force Wall: An invaluable skill, every bit some enemies are helpless before walls. At higher levels, this gives you consummate protection from some hard melee and ranged enemies by providing y'all with a wall that they cannot break. At lower levels, this is useful every bit an escape mechanism. Recall that you lot can shoot through this wall, but Calorie-free Manipulation is stopped past it.
Lite Manipulation: A breadstuff-and-butter attack skill. Lite manipulation gives you a ranged attack that never misses. It's rather weak early, just improves speedily. It also gives y'all the ability to emit light without a torch, but I find this to be a poor use for it. If yous run out of charges, call up that y'all can hit '.' on your numpad in order to skip a few turns and permit it to recharge.
Precognition: A very handy skill. It essentially saves the game, and allows you to play a few turns where if you die or if you wish to, you can return to the starting time. Information technology was recently nerfed heavily, so I'grand uncertain if it'due south still worth it. It has a few uses, such every bit:
one) Figuring out if yous actually tin can impale that enemy
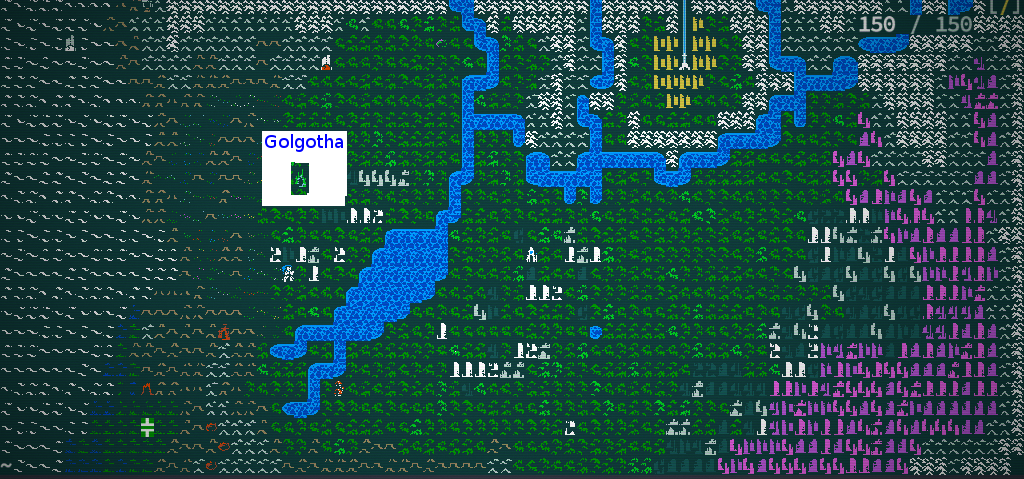
2) Figuring out where to go in Golgotha (come across "More Than A Willing Spirit")
iii) Killing Mayor Nuntu in Kyakukya, stealing the Corpus Chollys, and reading its contents without dying to Warden Indrix.
Sunder Mind: Your secondary attack skill. Sunder Mind ignores armor, and and then is useful against heavily armored opponents.
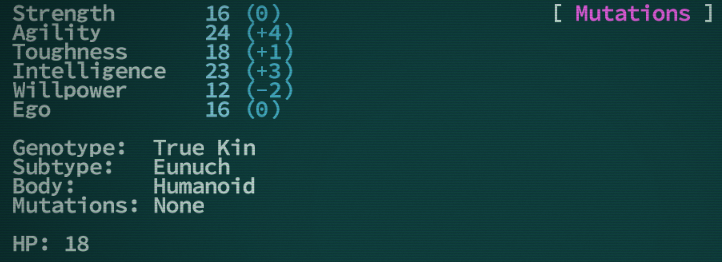
This is an agility/intelligence-based True Kin build. This build relies on agility more than than strength, and and then should focus on knives (which do good from agility to penetrate rather than strength) and the starting revolver when you begin. Buying atomic number 82 slugs from Tam in Joppa (See "What'southward Eating the Watervine") is a expert investment at the first.
Eventually this build tends to take Long Swords (Since Polluxus can be easily gotten from Sven in Kyakukya - meet "Raising Indrix") and rifles (For the masterwork carbine from "More Than A Willing Spirit" and the armcannon cybernetic). Squeamish early game skills to take are ones that grant mobility, like Jump and Charge from the Acrobatics tree, and Juke from Tactics.
Intro Quest: What's Eating the Watervine?
two) Young Ivories are the #1 crusade of death in this place. They are invisible, deal a large corporeality of damage, and cause more than damage over time due to bleeding. 'S'earching before you move every space is time consuming, and then simply ensure that you lot are at max HP earlier moving onto unsearched tiles. Y'all can also search without consuming time by holding ctrl and moving in a direction.
iii) Jilted Lovers are incredibly deadly, simply cannot movement. Ensure that you can take them out at range, or else ensure that you are at maximum HP before trying to attack.
There are besides a few creatures that may not be hostile. Snapjaws drop a lot of equipment, merely not all of it is profitable to carry. I find the about profitable things are daggers, and, if you have high strength to behave them, maces. For most characters, you lot will wish to wear armor with every bit much AV (the number next to the blue circle) as possible. If you accept high agility, you may wish to wear armor with every bit much DV (the number next to the hollow grayness circumvolve) as possible.

The girshling corpse, which you lot need to complete this quest, weighs thirty lbs. Experience free to drop stuff before moving onwards, you can e'er return. Only beetlebums will destroy stuff on the floor, so ensure that at that place are none nearby before dropping stuff off. After this, in that location are two methods back to Joppa:
ane) Through the overworld map. Probably the safest pick.
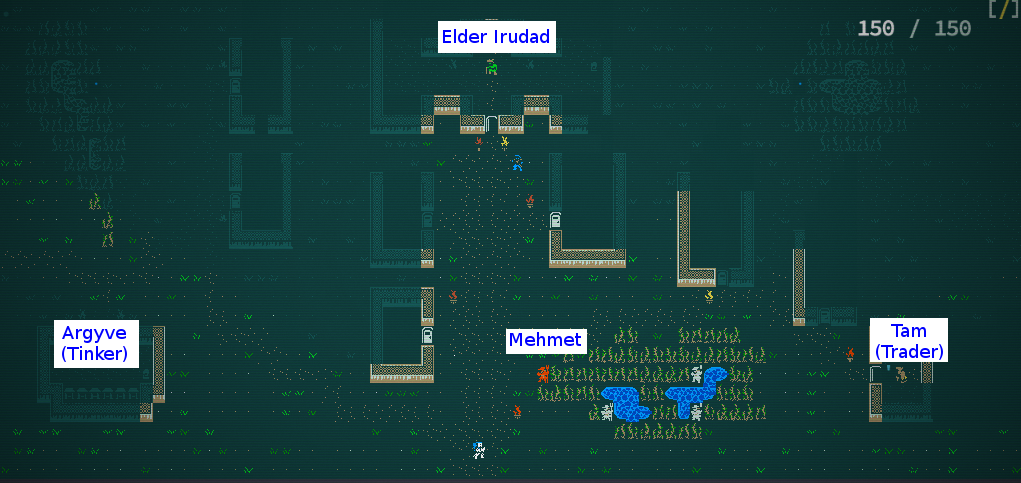
2) Through the waterlogged tunnel. You could take really used this path to become here, merely I can't recommend it as some monsters hither are rather difficult without a full set of armor. In particular, slugsnouts are fully capable of one-shotting most level 2 characters at range. To observe this, only follow the river due south half dozen screens, so find the stairways upward. You may find a glowing corpse here, which is an unfortunate miner. Boodle his body for a light-emitting helmet and a pickaxe, and read the parchment for his story.In one case back in Joppa, take the corpse back to Elder Irudad, who will give you a large corporeality of healing items and some XP for your troubles.
Argyve's Quests
Weirdwire Circuit... Eureka!

In that location is actually a second identify to grab blood-red wire, but it volition not cover all 200 feet... Traverse the watervine swamps, or check out my "Secrets of Qud" guide (not finished yet)
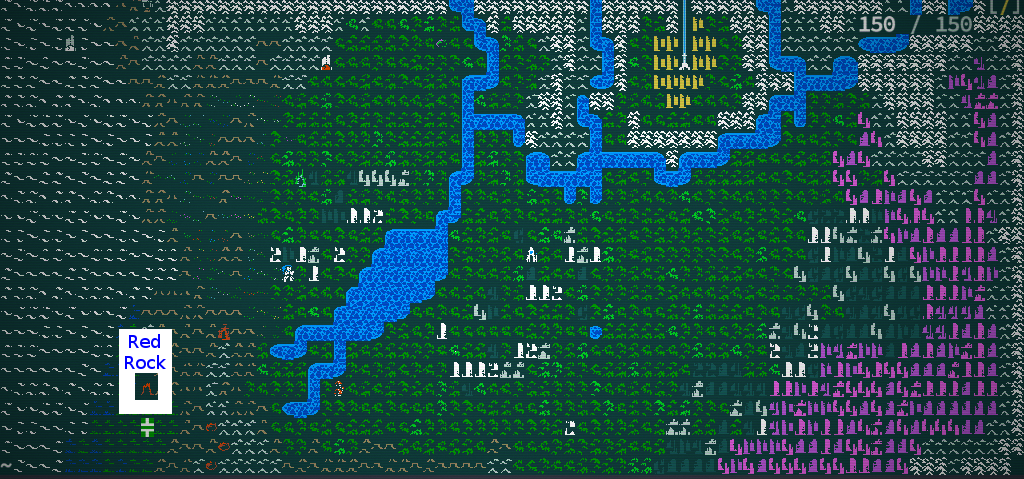
On the manner to the Rust Caves, your graphic symbol may get lost. Merely walk in the general direction y'all were headed in until you are no longer lost. Finding NPCs and talking to them volition also remove the 'lost' status. If you see strange fulcrete structures, move effectually that screen, every bit those enemies are unusually tough.
The Rust Caves are generally easy, except for ane thing: Qudzu can rust items if you lot manage to get in melee range. Try to bring some ranged attacks, or only grab as much wire from the surface of the three rust caves every bit possible. Otherwise, y'all risk losing some valuable items. Remember that Fix-It Spray removes rust.
There are a few enemies of note in the Rust Caves. Hibernate-Sheathed Hermits have an abnormally high AV, making dealing damage to them rather difficult. Spark Ticks give a large amount of XP, and aren't terribly deadly, but Electrofuges deal a lot of damage if you let them get close. Finally, slugsnouts can kill most adventurers this early on in a few hits. Attempt to strength them to move into melee range by hiding backside walls and waiting for them to move closer.
When you lot have all 200 anxiety (they must be unrusted!), return to Joppa and talk to Argyve for your reward.
Canticle for Barathrum
Yous may wish to buy a chem cell from Tam at this point if the recoiler Argyve gave you did non come up with one. Information technology is useful in a pinch to return back to Joppa, but remember that you cannot use it if enemies are nearby. The side by side quest Argyve gives you involves travelling to Dust Gate.

At the third floor, you will reach the entrance level. Become north i screen (the opening volition always be in the northward-center of the screen) and you will find yourself at Dust Gate. Talk to the screen at the right by pressing space while adjacent and you volition complete this quest.
More a Willing Spirit

For True Kin:
1) Sphinx Salt Injectors. Some castes accept a take chances of starting with this item, and it helps in telling yous which entrance is which.
2) Some method of quick movement across sprinting. Jump and Juke are both good places to starting time
3) Reeeally high AV or DV. High Toughness helps too.
For Espers:
1) Precognition. Tells you which entrance is which.
2) Force Wall. Non strictly needed, but helps blocks off chutes, and can forestall enemies from chasing you.
3) Teleportation. Not strictly needed, but helpful in a pinch.
4) Pyrokinesis. Not scritcly needed, merely helps articulate a path in the Cloaca.
For Chimerae:
ane) Multiple Legs or Spinnerets. Preventing enemies from chasing you is a big part of going down the chutes
two) High AV somehow. Carapace is squeamish, but you need to keep on moving, then avoid using the tighten carapace unless absolutely necessary.
iii) Flaming Hands. Not strictly needed, but helps clear a path in the Cloaca.
The chutes are levels of conveyor belts, with traps along the walls. These traps volition always change color before they fire, so yous tin can avoid them easily. Electrical and Acid traps tend to spray everywhere, so they are a bit harder to predict. Burn down traps volition only hit in a straight line, and crab traps volition but spawn venereal everywhere.
The conveyor belt will move you forwards every then often, so they help both you and the enemies become to the next area. At the end of each belt is another drop downwardly, until you reach the Cloaca.
Enemies of note are Agolmaggots, which have a nasty ranged attack, Saw-Handers, which tin dismember you if you are in melee range, and jels, which can spray slime everywhere when they dice. Jels may also spawn sewage eels when they die, so be careful. Sewage Eels or other sources of poison tin can crusade glotrot, of which curing is a hard process (but information technology is not a game ending illness, then don't worry too much)
When you return, there will exist a new bear named Otho. Talking to him will complete the quest. If you are level 18 or less, he will give y'all a Masterwork Carbine, which is a strong ranged weapon that shoots 3 bullets at in one case and holds 24 at a time. Its increased accuracy make it ideal even for unskilled characters with a minimum of agility.
If yous are very underleveled (Looking at the lawmaking shows that yous have to be level 12 or less) at this point, you may also receive the hologram bracelet. This particular creates an invincible hologram of you that walks around doing aught. Enemies will by and large assault the hologram, and then ranged users can pick things off from a distance.
If you are level 19 or above, you will only receive three grenades for your trouble. That'due south the perils of non playing risky.
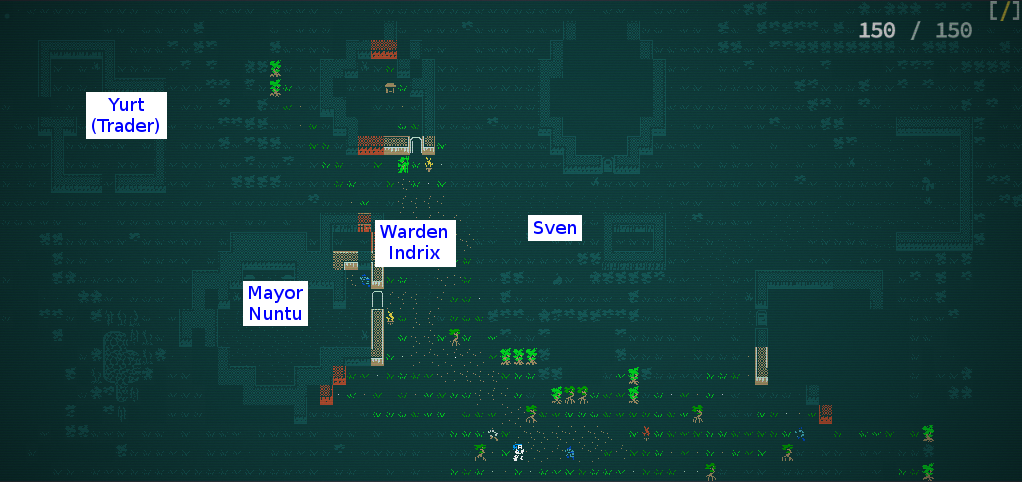
Raising Indrix
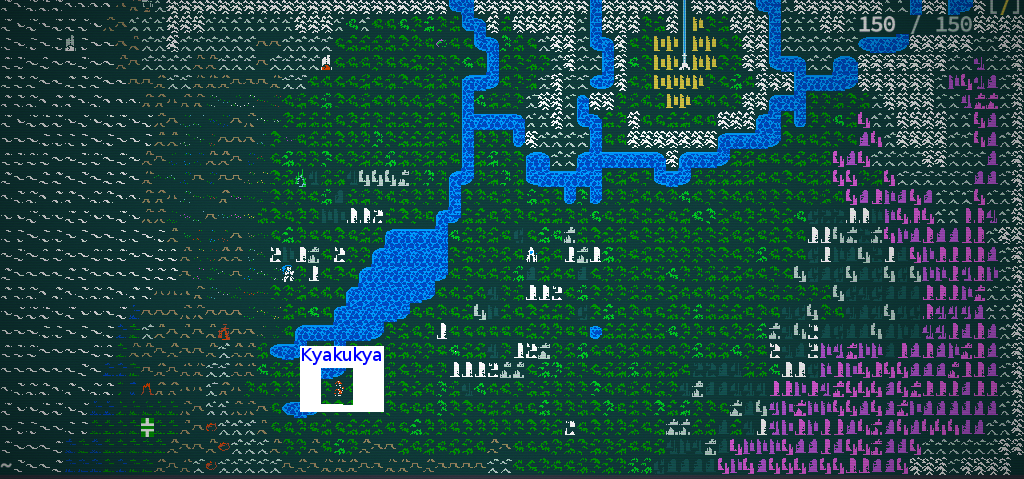
Instead, inquire almost the work he has to offer. He volition tell yous to take the river (1 screen north of the village, do not utilize the overworld map) east until you lot achieve his brother. Have, first look effectually Kyakukya:
At that place are 6 pools of fresh water, easily over 150 drams. You tin can use this to buy various things, but the #i thing to buy is Polluxus from Sven, which he commonly sells. It is a counterweighted (and so useful to characters without loftier agility) longsword that will hit the enemy and adjacent enemies for additional damage while powered. This extra impairment bypasses armor and is likely the weapon that about characters will employ for a large portion of the game. Either way, go on due north and and so due east.
Enemies along the river may exist rather unsafe. Night ruddy goatfolk are Sowers, and will deal a huge amount of damage via their special grenades. Getting into melee range somehow will stop them from throwing more, and they have a rather pitiable melee set on. Vivid cherry goatfolk are yurtwardens, and can deal a large amount of harm at range. Hide backside cover until they come close, and so set on. Yellowish goatfolk are Savages, and merely have a large amount of HP. Greenish goatfolk can repeatedly inflict fear, which is only unsafe if there are other enemies with them. Purple and blueish goatfolk can cast random mutations at you lot, so be careful.
Ice frogs can freeze you if you have no cold resist. If you lot are on a water tile while they are attacking y'all, they can freeze you indefinitely, so avert this.
Leeches can drain life, but are rather lamentable to anyone with mental armor (i.e. that have points in Willpower).
The river is rather long, though I've never counted the number of screens. Halfway along you will find a slaughtered village. Inside the chest in 1 of the houses is some rather skilful boodle, and a parchment (possibly penned by Marmon?). On the screen before Marmon, the river volition exist stained with blood and fume volition be in the air. There is a nonhostile human being that you can talk to for some story, and that sells body parts and blood.
On the next screen is a freshly ruined village. Some areas will be on burn down, so exist careful when walking nearly to not become set aflame. Marmon will always be surrounded by Goatfolk Thralls (nearly identical to Savages), and pygmies. Be conscientious not to let him go far close range, as he often has several mutations that act in melee range.
His mutations will generally be high level, but he himself does not have much protection. One time he is expressionless, he will drop the Aramanthine prism, a cursed item that y'all cannot remove once yous equip. Information technology has a story that you can recall when you examine it, and is rather sad. He besides volition drop his armor and weapon(s), which volition generally exist of high level. The village may have other chests to boodle. Once y'all are finished, become back to the overworld with '<' and caput back to Kyakukya.
You have a pick at this point. You can either keep the Amaranthine Prism (talk to Warden Indrix with it equipped or refuse to give it to him when he asks), or give it to the Warden for a random Carbide-level weapon/armor. The choice is yours. The Prism itself gives +1 Ego and -1 Willpower when you offset equip it, only as you level the ego bonus and willpower malus increment.
At this point, you lot may wish to consider inciting civil war. Bringing in a group of enemies from a neighbouring screen may cause Sven, a hunter in Kyakukya, to endeavour to attack. He isn't 100% accurate, and so he will often hit other things. Warden Indrix does not appreciate this, and the two may duel to the decease, giving you the items from either 1 that dies. Attempt not to draw in enemies from the west, as Yurt volition likely try to help, and Yurt's idea of helping is to summon a bunch of angry plants that will forever stick effectually.
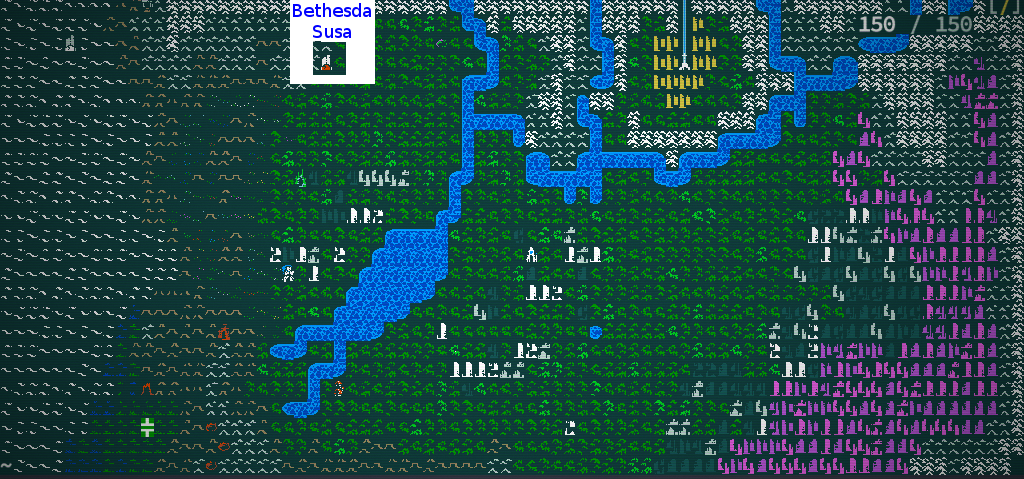
Decoding the Signal Pt1
Set up for the 3rd last quest in Qud? This is a quest that requires some amount of cold resist, so grabbing equally much as you tin (Sven in Kyakukya sells some, and you may find some on your own. You tin too accept the 'Weathered' skill in Endurance for some more) is good. Bethesda Susa is easily the concluding hard dungeon at the fourth dimension this guide is written, so hang on tight.

Fjorn-Kosef, Who Knits the Icy Lattice is always the 2nd king. He is capable of instantly cooling the surface area effectually you, while creating icy webs. This will concord y'all in place or freeze y'all while he does incredible damage at melee range. Standing in the covalescence will still heal y'all hither, just be wary of information technology turning into cyrogenic mist due to this guy - it will hurt.
The terminal Troll Male monarch is invisible! Haggabah, Who Plies the Umbral Path can only be seen by his splashing footsteps, or past the troll foals he spawns. Pressing '\' will hide the sidebar, allowing you to see the unabridged room at in one case.
In that location are really several ways of finding him despite his invisibility:
one) The Jump skill volition not allow you to land on the aforementioned square as him, and will exist greyed out.
2) Firing wildly and seeing where the contrivance/hitting blitheness plays tells you lot where he was last turn.
3) If he spawns a troll foal, he is always in an adjacent square.
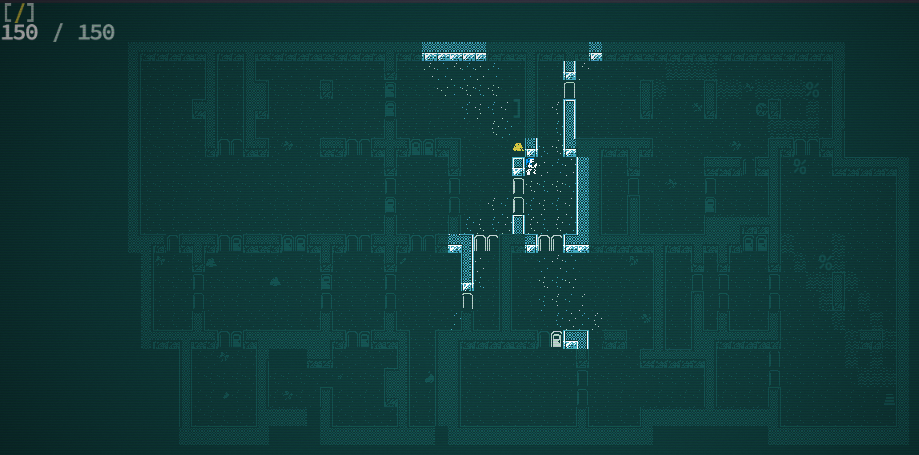
4) Hold ctrl and hit a numpad direction. If he is there, you volition swing at him. If he is not, you lot will not waste any time.Either way, he deals an impressive amount of melee damage, so be careful. Once he is dead, you are finally in the Wards of Bethesda Susa.The Wards accept a multifariousness of enemies that are all actually difficult. Yous can by and large tell what to wait out for past looking for specific cues:
1) If y'all encounter slime, there is a Snailmother on the level. The ickslugs she spawns tin can inflict poison and Glotrot, so killing her is a big priority. Notation that she is, past default, neutral to you, so you will have to hold ctrl+move to attack her first if you are a melee graphic symbol.
2) If you see Molting Basilisk Husks, there is a Molting Basilisk on the level. Molting Basilisks look exactly like Husks, except for a few things:
- They suffer from coldness, and so they will change colours
- In the version this guide was written in, the tile they have actually looks different. Husks are grayness Rs, the Basilisk has an actual tile
- If you move out of sight of the existent Basilisk, it volition disappear. The Husks exercise not.
Either way, trapping and killing information technology is your best option.
3) If yous see a Luminous Hoarshroom, STOP. Around it is likely Lurking Beths. There are a stronger version of the Immature Ivory from Red Rock, only they besides spawn in groups, so moving apace is an like shooting fish in a barrel fashion to run into many and dice. For reference, I recommend having over 60 HP at this point.
4) Twinning Lampreys must be killed at the aforementioned time. Easiest to practise if y'all accept a freezing weapon.
v) Blue Jels are neutral to you, but if you kill them, they drop some Covallesence you tin can use to heal. Your selection.
6) Booster Bots will inject you with random Injectors. normally beneficial, simply getting hit twice or more than is usually lethal. Do not let them hit you lot, either past having high DV, loftier AV, using Force Wall, using Holograms, etc.
On the first flooring, y'all will notice a control panel somewhere near the heart. Y'all tin can use this to skip the bulk of Bethesda Susa if you lot wish past calling up the platform (look around with 'l' to run into if the tile beneath information technology is empty space or a platform) and then standing on it and pressing space. You will only miss out on some Sparking Baetyls, some experience, and the Alchemist.
Decoding the Signal Pt 2
The spider cannot assail non-phased enemies. I believe you can as well use the phase webs to get through, merely it is extremely dangerous to practice then, as unphasing while in a wall will INSTANTLY kill you. Use Sphynx Table salt (True Kin) or Precognition (Espers) before trying.
The second floor of the cyrobarrio is likewise very dangerous! There are several intact containment cells, ane or two assorted enemies, and a juicing cannibal. The juicer is equipped with a rocket launcher that volition break open the cells, releasing the contents. The enemies in the cells are extremely dangerous, then accept out the juicer every bit quickly as you can. Of course, the rocket launcher itself is capable of dealing >40 harm in a single hit, so some method of trapping the cannibal or attacking from range is preferred.
As for the optional bosses here, there are two noteworthy ones. The Rhinox can easily deal 300 damage in one hitting to fifty-fifty a well-armored grapheme, but masterfully butchering the corpse gives one of the best cudgels in the game. Saad Amus The Sky-Bear holds an axe that tin ignore armor, and has a flume-flier that allows him to dash all the manner across the screen for actress damage. The flume-flier is also useful for espers, as it gives you additional ego. His sandals are worth a lot of coin.
Ripe For the Conflaguration

A Phone call To Arms
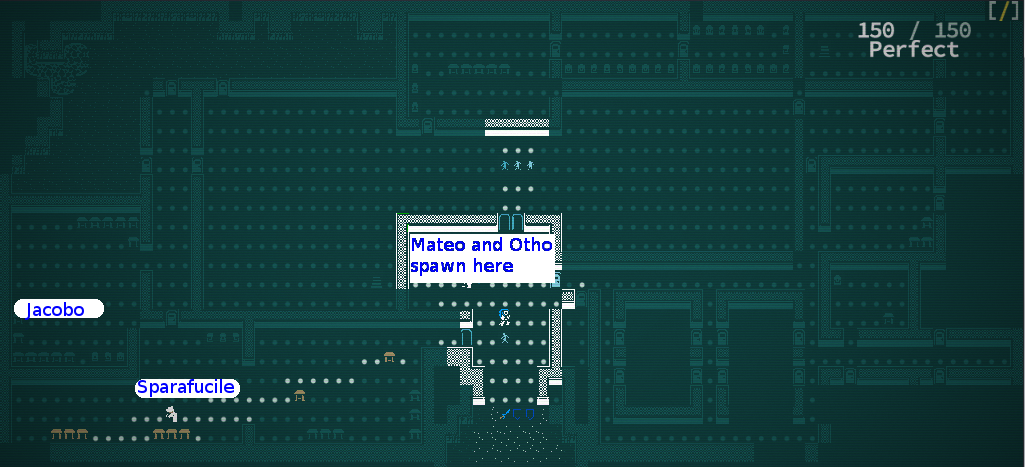
Once you manus in the previous quest to Otho and then move one stride, this next quest immediately begins. If you lot are an esper with Strength Wall whose cooldown is shorter than its duration, it will exist invaluable here. Otherwise, fix for an arduous battle. One turn after you hand in the quest, all of the robots in the area will be hit with EMPs, and you volition accept to confront ~12 mechanist paladins at once. They spawn from the southern entrance. Mafeo and Otho will try to fight, only they will quickly die if y'all cannot protect them. If they dice, they will exist replaced with ii generic Urshiib Librarian and Urshiib Merchant NPCs (the merchant will not restock inventory). Hand in the quest, and you will have finished the primary storyline of the Caves of Qud upwards to this point.
Source: https://steamcommunity.com/sharedfiles/filedetails/?id=484204201
0 Response to "Regalo Extra Tall Extra Wide Baby Gate, 29''-52'' With Walk Through Door"
Postar um comentário